The Sims 4: How to Play Like a Baby

The Sims 4’s latest update finally adds infants to the base game, ending the days of your Sims children loitering around like baby potatoes until they reach the toddler level. The infant is now a completely interactive and functional (well, semi-functional) Sim that is able to eat, eat, babble, and even breastfeed. Players can purchase enough The Sims 4 Standard Edition in the game to learn how to play The Sims 4 like a baby after reading this guide.

Add baby to family

In Make a Sim, babies can now be directly produced and edited (CAS). The Genetics option can be used to make brand-new children on one or more Sims who are at least young or older, or existing Sims can age till infancy. When it’s hot or chilly, formal or casual, or when they’re napping, babies wear adapted toddler clothes.

There are six traits available in The Sims 4’s base version:

Though calm, they may also be too lethargic to explore because they are less prone to become irritated.

Be cautious: Infants like the familiar and detest the unfamiliar.

Intense: Children in The Sims 4 are amusing but easily irritated.

Sensitive: has trouble staying awake but is a food snob.

Sunny: They’re content, but they need more social interaction.

Wiggly: Infants explore eagerly yet struggle to get to sleep

Also, new children will be born as a result of ongoing Sim courtships or if the “Birth a Baby” option in “Neighborhood Tales” is selected in the green menu located in the upper right corner of the “Manage Family” screen. They may have qualities from their grandparents or someone else because of their genetic composition, which will likely be more random. Several of these characteristics will be restricted by default, however cheat codes for The Sims 4 on PC or console can change them.

Babies’ needs and actions

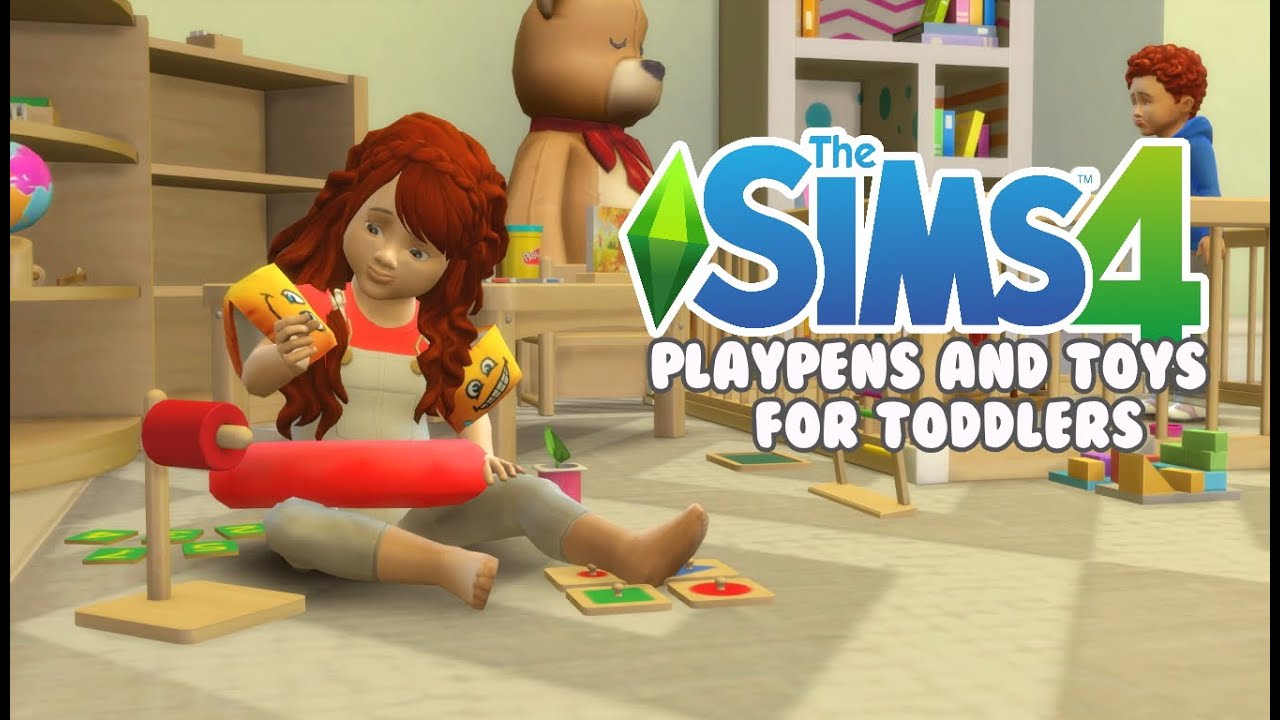
A number of new items may be discovered in the Kids section of build mode as part of the March update. Infants require a crib to fall asleep and cannot rely on a bassinet or toddler bed. If The Sims 4 household has several offspring, each of whom has a unique life situation, this can take up a lot of room. However, infants can still read books appropriate for toddlers and use a high chair.

Any Sim who is at least a teenager can bottle-feed a baby. Either side can start this interaction, but the older Sim must go to the baby’s location. Sims 4 Infants are unable to consume prepared food, unlike Toddlers. Alternatively, if using a high chair, kids can try packaged pastes like ice cream and hummus. If the baby empties the bladder, an elder Sim is needed to change the diaper.

Infants are unable to use steps or ladders to ascend to higher floors because they can only crawl, not walk. All the difficult-to-reach spots require older Sims to carry newborns. Low-hanging objects like dollhouses, bookcases, and toy boxes can still be interacted with by them. In The Sims 4’s base game, these things will serve as their main source of enjoyment. Packs also include extra infant interactions like those with cats and dogs, fatherhood, and toddler-related items. To play the game like a baby, players can prepare enough of The Sims 4 Deluxe Edition.

Red Dead Online: How to Enable Autopilot

Red Dead Online’s open world is just as expansive as its story mode, and getting around without using a secret feature that functions like autopilot may be a real hassle. With the use of this function, players can travel a variety of dirt paths without having to physically steer their horses. Red Dead Redemption 2 features a lot of horses, and mastering their management is essential to winning. Here’s a guide on how to put your horse under automatic control so you may concentrate on your work. Red Dead Redemption 2: Special Edition for Sale can be prepared by players enough.

What is Autopilot

Red Dead Online has a vast and varied selection of maps. We’ll be fascinated at first, but if we travel frequently (as when we’re collectors), it can get boring traveling between far-off places. Rockstar does, however, give us the option to utilize a form of autopilot that will “drive us” to a certain spot on the map.

How to march with an automatic horse

Most players are unaware of this mode, therefore they will have to take some action to make it available. Many users choose to ride with an autonomous horse since it saves time compared to using Red Dead Online’s fast travel option, which necessitates going to a railway station, buying a ticket, and waiting for a train. Thus, players can take the following actions to enable this feature:

Step 1: Stop Horst and open the map

Step 2: Place a waypoint on the map

Step 3: Sit on the horse, hold down the X (PlayStation) or A (Xbox) button to start the ride

Step 4: Press the touchpad (PS4/PS5) or view button (Xbox) to enable movie view

Step 5: Don’t press any button as it will disable movie mode i.e autopilot

When in movie mode, the camera perspective will alternate frequently to simulate a scene from a film or television program. Red Dead Online is not immune to attacks from foes and predators, therefore gamers should be on the lookout for them. The player should always keep their eyes on the screen to prevent a tragic death because the horse will fling them away in these circumstances.

Pros and Cons of Using Horse Autopilot

Because the player doesn’t have to focus too much on the navigation course, autopilot is helpful. Ultimately, the travel may be easier as a result of the shifting camera views. Also, this allows gamers to make new discoveries. Many gamers have found a spot that they would have missed if they had been operating automatically.

Remember that the AI of the horses from Red Dead Redemption still powers autopilot. The autopilot will be disabled and the player will have to take over if the horse becomes scared while they are riding. Avoid spending too much time away from electronics or leaving the room when traveling. Players in Red Dead Online are still susceptible to attacks from animals, NPCs, and other gamers. In-game autopilot needs to be enabled by players Buy Red Dead Redemption 2.

Using the Diamond Palette: 4 Tips and Tricks

This guide will show you how to make the most of this helpful diamond painting tool. You can also purchase exquisite ones at topdiamondart.com Diamond Painting for Sale. Each diamond painting kit includes a set of tools, including a diamond painting tray, which is ideal for holding the drill while painting.

Proper Arrangement of Diamond Bits

The drill should be held flat with the facets pointing up on the Diamond Paint Tray. In order to make it simpler to pick up numerous drill bits at once with the multi-placement tool, they also constructed mechanisms that line up the drill bits. What if the drill was left lying flat? Place the bits into the tray one color at a time, taking care not to overfill it because the bits need room to travel around without spilling. Once the majority of the pieces are lined up, gently shake the tray from side to side. Tap the tray’s nozzle end gently. By doing so, the bit will glide back and produce a clean, tight line. You can now pick up your drills either by yourself or using the multi-placer.

If additional bits are needed, add them to the tray after applying all of the ordered bits to the canvas. Then, shake and tap the tray again to create further arrangements. Just pour the colored liquid back into the bag or container using the spout end when you are finished.

Secure the tray with sticky pads

Do you use an easel when creating? Do you carry a diamond tray? While many people find this to be effective, holding the tray increases your risk of dropping or spilling your food. Use the somewhat sticky self-adhesive pads to secure the tray to the canvas when painting on an inclined surface, such as an easel. These pads are available as car phone mounts in the automotive section of many retailers, or you can look for them online by searching for “double-sided adhesive pads.”

By using one of these mats, you may keep your drill close at hand while preventing inadvertent tray tipping or drops. The double-sided self-adhesive pad is excellent for attaching the tray to a level surface even if you don’t use an easel. The risk of bumping the tray and knocking it off the table is decreased by the pads.

Use Organizers to Stack Your Trays

An excellent tool that makes it simple to maintain order and neatness in trays of drill bits in various colors is the Diamond Painting Tray Organizer. While working with intricate patterns that have numerous colors, stacking your pallets puts everything in one place and is effective. Simply search online for “diamond painted storage boxes” to find them; they are extremely reasonably priced and come in a wide range of shapes and sizes. Discovering one that completely satisfies your demands shouldn’t be difficult.

Use the tray to separate the bit blocks

Do you have diamond pieces that are adhesive? Do not attempt to manually separate them. Put them in a tray instead, then put another tray on top of that. The parts in the lower tray should readily pop out if you gently push down on the top tray. You should even hear a gratifying “crack.” Rub the trays together until they separate to release any especially stuck pieces.

Although they may not always receive the same amount of praise and appreciation as some other diamond painting tools, diamond painting trays are an essential component of any job. To assist you in creating diamond paintings, you may get Cheap Diamond Painting Kits from the app store.

New vs. Old Locks: A Practice Guide to Lock Selection

It can occasionally be more difficult to choose the next practice lock to crack than the actual lock itself. There are so many choices, brands, and occasionally even colors. This may be accomplished with lockpicking by just knowing which practice lock to concentrate on first. Each practice lock you open teaches you something new, a lesson you only learn through the tears and tribulations of lockpicking. At lockpickmall.com, you can also get sufficient Lock Picking Tools to distinguish between new and old locks.

Used lock

A used lock can be used for the following things in addition to having a rusty smell, broken parts, and outdated money.

Happy piggy bank

Cost is, of course, the first and most evident aspect of purchasing practice locks. Sifting through mountains of trash to find a few locks worth picking out can be a difficult effort at times, but if you use this method, you can save a lot of time and get several very excellent locks for the price of one. new lock that is good.

Sloppy

Additionally, as the key forcefully scrubs and scrapes the internal parts of the lock, it flattens the tips of the pins on the key, causing further rubbing and erosion. Each needle’s body experiences unequal diameter reduction as it rubs against the chamber walls, which might result in a dynamic binding order. When the pins move up and down the walls, they also begin to rub off.

Uneven wear

A needle will begin to corrode in the same way—that is, unevenly—if it is rubbed in the same direction for a long enough period of time. As a result, the pin will develop a thinner side on one side. As a result, you will have a pin whose binding order is flexible.

A pin’s thickness has a role in establishing the binding sequence. The pin binds later if the pin is turned to expose the thinner side and then picked up. In conclusion, the erratic behavior of used locks can be entertaining as well as annoying.

Dirt

Older locks, particularly those that have been exposed to the elements, may have some accumulation that somewhat or significantly increases friction between some or all of the parts. Dirt, dust, worn-out brass fragments, or even dry lubricant that has turned sticky can all contribute to this buildup. Feedback will effectively be reduced if there is increased friction inside the lock, especially if the friction is caused by a viscous substance.

New lock

Many properties of the lock are diametrically opposed to the used locks.

Lively and sensitive

A brand-new lock has the advantage of being fast and responsive with little wear and friction. Every edge that should have an edge will have one, and everything that should be round will be round. You’ll receive more feedback from newer practice locks because of this brittleness.

Tighter tolerances

The tolerances are unquestionably the tightest because new locks have the least amount of wear. In the core and needle chambers, there are hardly any slopes. A lockset with a great profile is essential since the key pins will have sharper tips that cause some slide between the tip of your pick and the pin. Moreover elastic will be the spring.

New technology

Although it may appear that modern locks should be more safe than older ones because advancements in technology and security features are typically brought about by time, this isn’t always the case. Since certain manufacturers started to skimp on component quality, several subsequent models of the lock have gotten worse over time. So, a lock’s age or “freshness” is a misleading indicator of its efficiency and difficulty.

Picking up an old lock and cleaning them can be great if you’re new to locks and want to spend as little money as possible on your locks. Check out our fantastic variety of Locksmith Tools at lockpickmall.com if you’re curious about all types of locks.

How to Find and Kill Sheepsquatch in Fallout 76

There are numerous different monster types in Fallout 76. The player will come across a wide variety of monsters throughout the course of the game, each of which can be used in a different way. This is so that they can make more items to aid in their survival in the game by using the pieces of monsters. Among them, the Steel Reign update makes no changes to the Sheepsquatch in Fallout 76, a well-known monster that was first introduced in the Wild Appalachia update. This article will explain how to locate and kill sheepsquatch in Fallout 76. To do this, players must have a sufficient number of Fallout 76 Caps.

How to find Sheepsquatch in Fallout 76?

Sasquatch and sheep hybrids known as “sheepsquatch” can grow to heights of up to 10 feet. As these atrocities are so difficult to defeat, a group of players is usually always necessary. Yet, gamers may defeat them with the appropriate strategies and tools. Players should investigate these hotspots in Appalachia to locate sheepsquatch because they have set locations there in Fallout 76. Also, they may be seen at gatherings like Free Range, Raw Cut, and Paradise Project.

Sheepsquatch may use a variety of attacks, such as a basic melee strike that stuns opponents, an AOE assault that delivers significant damage, and a poisonous ranged strike. To determine which offensive method suits them the best, players must try with a variety of approaches. Before a conflict, it’s also vital to stock up on supplies and backpacks. The Sheepsquatch in Fallout 76 can be defeated with the correct combination of people or a daring solo player, but take caution: they are incredibly dangerous enemies. Don’t undervalue their intelligence, then.

Sheepsquatch location in Fallout

The majority of the monsters in Fallout 76 will have set spawn points. This is due to Bethesda realizing that players would want to hunt and farm the monsters they had made for some reason. The following sites provide players a chance to encounter Sheepsquatch:

Sundew forest by the stream

Monorail Elevator (North Side)

scenic overlook

overgrown sundew forest

Braxon’s Premium Medical Supplies

Near Vault 96

None of the aforementioned sites can reliably produce Sheepsquatch sightings. Players might therefore have to switch servers in order to locate their Sheepsquatch. Yet, a few circumstances ensure the spawning of a sheepsquatch. To find Sheepsquatch 100% of the time, players must take part in Free Range or Project Paradise events.

Sheepsquatch employs a variety of strikes, including straightforward swipes and headbutts. These melee blows provide little physical damage, but they stun opponents, making them more susceptible. Sheepsquatch also have a high damage AOE attack in which they fire out their quills. Players’ ranged accuracy will decrease and they will be staggered by the monster’s leap strike. Last but not least, Sheepsquatch has two ranged attacks: a throw assault that poisons and a long-ranged ram attack.

There is no set range to assault monsters because Sheepsquatch can attack from anywhere. Gamers must experiment with various attack techniques in order to eliminate the flock. Sheepsquatch is a challenging but defeatable foe in Fallout 76 with the correct supply and the right combination of players (or a brave solo player). Enough Fallout 76 Bottle Caps are available for purchase in-game.

How to Get Flint Quickly in Valheim

For Valheim players, flint is a crucial early-game resource, although locating it might be challenging depending on the world seed and respawn position. You’ll quickly start amassing collections of items if you know where to look. All you have to do is go to the map’s specific biome regions. This guide will instruct gamers on how to purchase sufficient Valheim Items in the game in order to obtain Flint in Valheim swiftly.

What is Flint good for?

At Waalheim, flint is used to make a variety of products, including flint axes, knives, and arrows. The arrows in particular will make boss battles much simpler. Flint mainly functions when you’ve constructed your workbench. This allows you to create a variety of slightly more sophisticated weapons for fighting and resource collecting, such as flint axes, knives, and arrows. You can use these in particular to aid in defeating the first boss.

It serves as a sort of transitional stage between working with wooden objects and dealing with metals like iron. Even if the information above doesn’t grab your attention, you’ll need to acquire flint and steel at some time in order to begin producing essential mid-game items. Numerous workbench upgrades also call for these materials.

Flint Locations: How to Get Flint Easily

In order to gather flint and steel, players can utilize a variety of strategies, all of which include utilizing the Valheim gaming system to obtain resources. The player’s character in Valheim is not restricted to their home world and is free to visit any other worlds they have created. Gamers can construct new bases, develop new planets based on Valheim base-building strategies, and begin researching potential locations for Flint to appear.

Despite the fact that players can begin the game in any Valheim globe without issue, due to the procedural generation of the game, players occasionally find themselves starting in a location where critical resources have been depleted. Therefore when looking for Flint and other materials, switching between planets is a good tactic. Players can also experiment by erecting side bases close to huge amounts of water. Flint will respawn after a while, just like other materials in Valheim, enabling players to harvest more resources.

In any scenario, putting up solid defenses is essential. In Valheim, there are several deadly mobs, such as Necks, which spawn nearby bodies of water and can obstruct the use of flint and steel. Before leaving, players should make sure they have a few basic tools and weapons.

Players must acquire Flintstones as soon as they have established themselves in Valheim because having Flintstone tools and weapons puts them closer to getting more sophisticated gear, such Valheim’s rare Wolf Armor. Fortunately, there are numerous ways for players to get the required quantity of Flint, as well as more. To win the game, a player only needs to prepare enough Valheim Resources.

Valheim: How to Get Eitr

Over the past few months, the survival game Valheim has been more well-liked. Eitr, a brand-new magical resource that can be found in Valheim Mistlands, is also a crucial resource in the game. In the most recent update of Iron Gate’s viking survival game, it has numerous applications and can create a variety of new items. This article will show users how to get Eitr in Valheim; they must purchase enough Valheim Resources in the game. If you want to obtain this new resource, you must enter the Mists.

What is Eitr in Valheim?

Eitr, as was already explained, stands for both Resource and Stat in the game. To create new mythic armor and weaponry, Eitr is refined. Eitr stats are produced by ingesting Eitr-induced meals and will gradually regenerate. The speed of regeneration will increase if the character is wearing armor made with Eitr.

How to get Eitr in Valheim?

Eitr is a magical substance, hence it seems logical that it sprang from a fantasy substance like the sap of Yggdrasil. The Mistlands contain the roots of numerous holy trees, and you can collect sap from the trees’ green glowing regions. To gather this material, though, and to assemble it, you’ll need a workshop and a specific extractor.

To craft a Juice Extractor, you will need the following items:

Black metal x5

World Tree x10

Dvergr Extractor x1

A ferrous metal axe can be used in the Mistlands to gather ferrous metal, which can also be found in the Plains and Yggdrasil Wood (opens in a new tab). The last thing on the list, though, is quite challenging to understand.

Dvergr extractors are simple to locate because they are frequently discovered within crates that are inscribed with blue runes in the Dvergr camp. These NPCs are not hostile, but if you fight them or attempt to take their property, they will become very irate. Generally, prepare to fight extractors as soon as you grab them, or open a passage so you can flee quickly; however, keep in mind that they may also cast spells at you.

You can head to the nearest glowing Yggdrasil tree root after picking up the Dvergr Extractor and learning how to make the Sap Extractor. Install a standard workbench first, then construct the Sap Extractor to begin acquiring resources. The detailed instructions on how to obtain Eitr in Valheim are listed above. In the game, players can purchase enough Valheim Items to aid in obtaining Eitr.

Destiny 2 Lightfall Headlong Quest Guide and Vex Puzzle Solution

Players must solve a unique riddle in the Headlong mission before moving on in Destiny 2’s Lightfall campaign’s halfway point. Here are some quick tips for completing Destiny 2: Lightfall’s Headlong problem. These puzzles are based on the production of Vex adversaries, whom the player must eliminate in a particular order to advance. This guide will explain how to complete the Lightfall Headlong task in Destiny 2 and solve the Vex puzzle. Players should have enough Destiny 2 Silver on hand before starting the game.

Destiny 2 Lightfall Headlong Mission Walkthrough

One of the later Destiny 2: Lightfall campaign tasks, Headlong, requires you to finish the Strand training. You can accomplish this by using the Strand to destroy large numbers of Vex while navigating new lock problems that are connected to roadblocks in your way. You must kill matching combinations of luminous cationic harpy and regular anionic harpy in order to unlock any of these barriers by reading the lock code, which is made up of glowing or dull lights above the barrier from left to right. The harpies will all resurrect if you kill them in the wrong order, unlocking the riddle once more.

Vex Lock Puzzle 1

Vex Lock Puzzle 2

Vex Lock Puzzle 3

We have some hints for further descents after defeating the Vex and working out their obstacle puzzles, you’ll eventually enter the VexNet training session where you’ll be tested on your ability to grapple around on waves of Vex and use the Strand destructively, a difficult battle in Finally waiting.

How to solve the Destiny 2 Headlong quest puzzle

You will be in the Dawn Harbor region of Neomuna during the Headlong mission, close to the Thrilladrome Lost Sector entrance. But, a Vex barrier has barred the door, and you must work out a minor riddle to get through it. Four harpies will spawn when you take out the goblins and Vex Minotaur guarding the entrance, but don’t kill them yet.

Instead, notice the three crystals, each of which is either shining or not, above the barrier-covered entryway. Also, you’ll see that certain harpies glow while others do not. The order in which you slay the Harpy, from left to right, is displayed on the crystal above the door. You must kill a glowing harpy, a normal harpy, and then another glowing harpy, for instance, if the order of the crystals is glowing, non-glowing, and glowing like mine.

Each crystal takes a while to recognize when you’re finished, but once it does, it vanishes, allowing you to move on to the next one. When all three are finished, the barrier lowers, allowing you to carry out the remaining tasks. More harpies and a hurdle will appear later, but you can still pass by using the same strategy.

There are conventional harpies mixed in with glowing cationic harpies and non-glowing anionic harpies, making the third problem in the quest a little trickier than the others. Like before, in the left-to-right order indicated above the barrier, kill the two distinct sorts of harpies and stay away from the common ones. Players can purchase enough Destiny 2 top up in-game to help solve puzzles.